

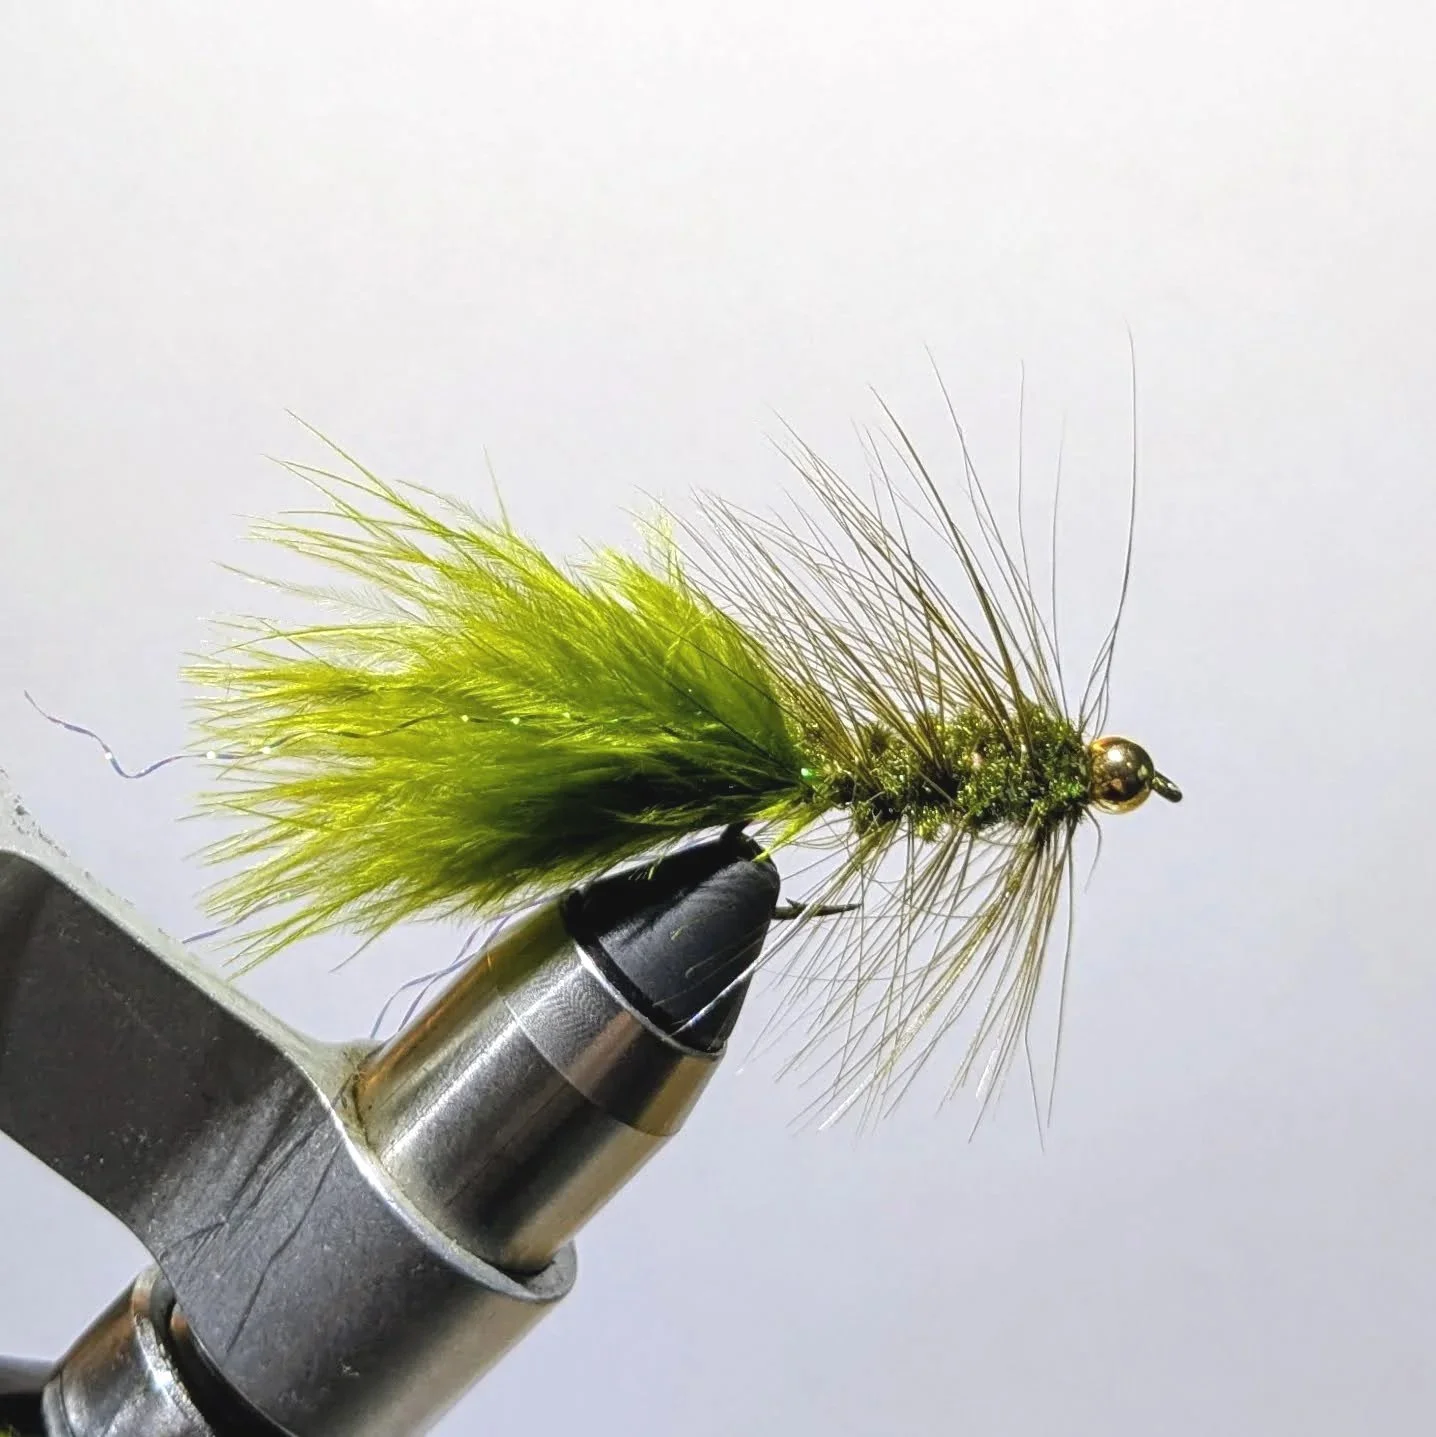
Olive Bead-Head Woolly Bugger

The olive bead head woolly bugger is one of the most versatile and productive flies in any angler's box. This pattern imitates everything from leeches and baitfish to large aquatic insects, making it deadly effective in both still and moving water. The addition of a bead head gives the fly extra weight, allowing it to sink to feeding fish, and adds an attractive flash that often triggers strikes.
Materials Needed
Hook: Firehole 839 3XL Streamer Hook (Sizes 4-12)
Bead: Firehole Stones Round Tungsten Beads - Gold or Copper
Thread: Semperfli Classic Waxed Thread - Olive (6/0 or 8/0)
Tail: Nature's Spirit Fish Hunter Blood Quill Marabou - Olive
Flash: Olive Flashabou Accent
Hackle: Olive or Olive Grizzly
Rib: Gold or Copper Wire
Optional: Lead wire or lead-free wire
Tools Required
Whip finish tool
Step-by-Step Instructions
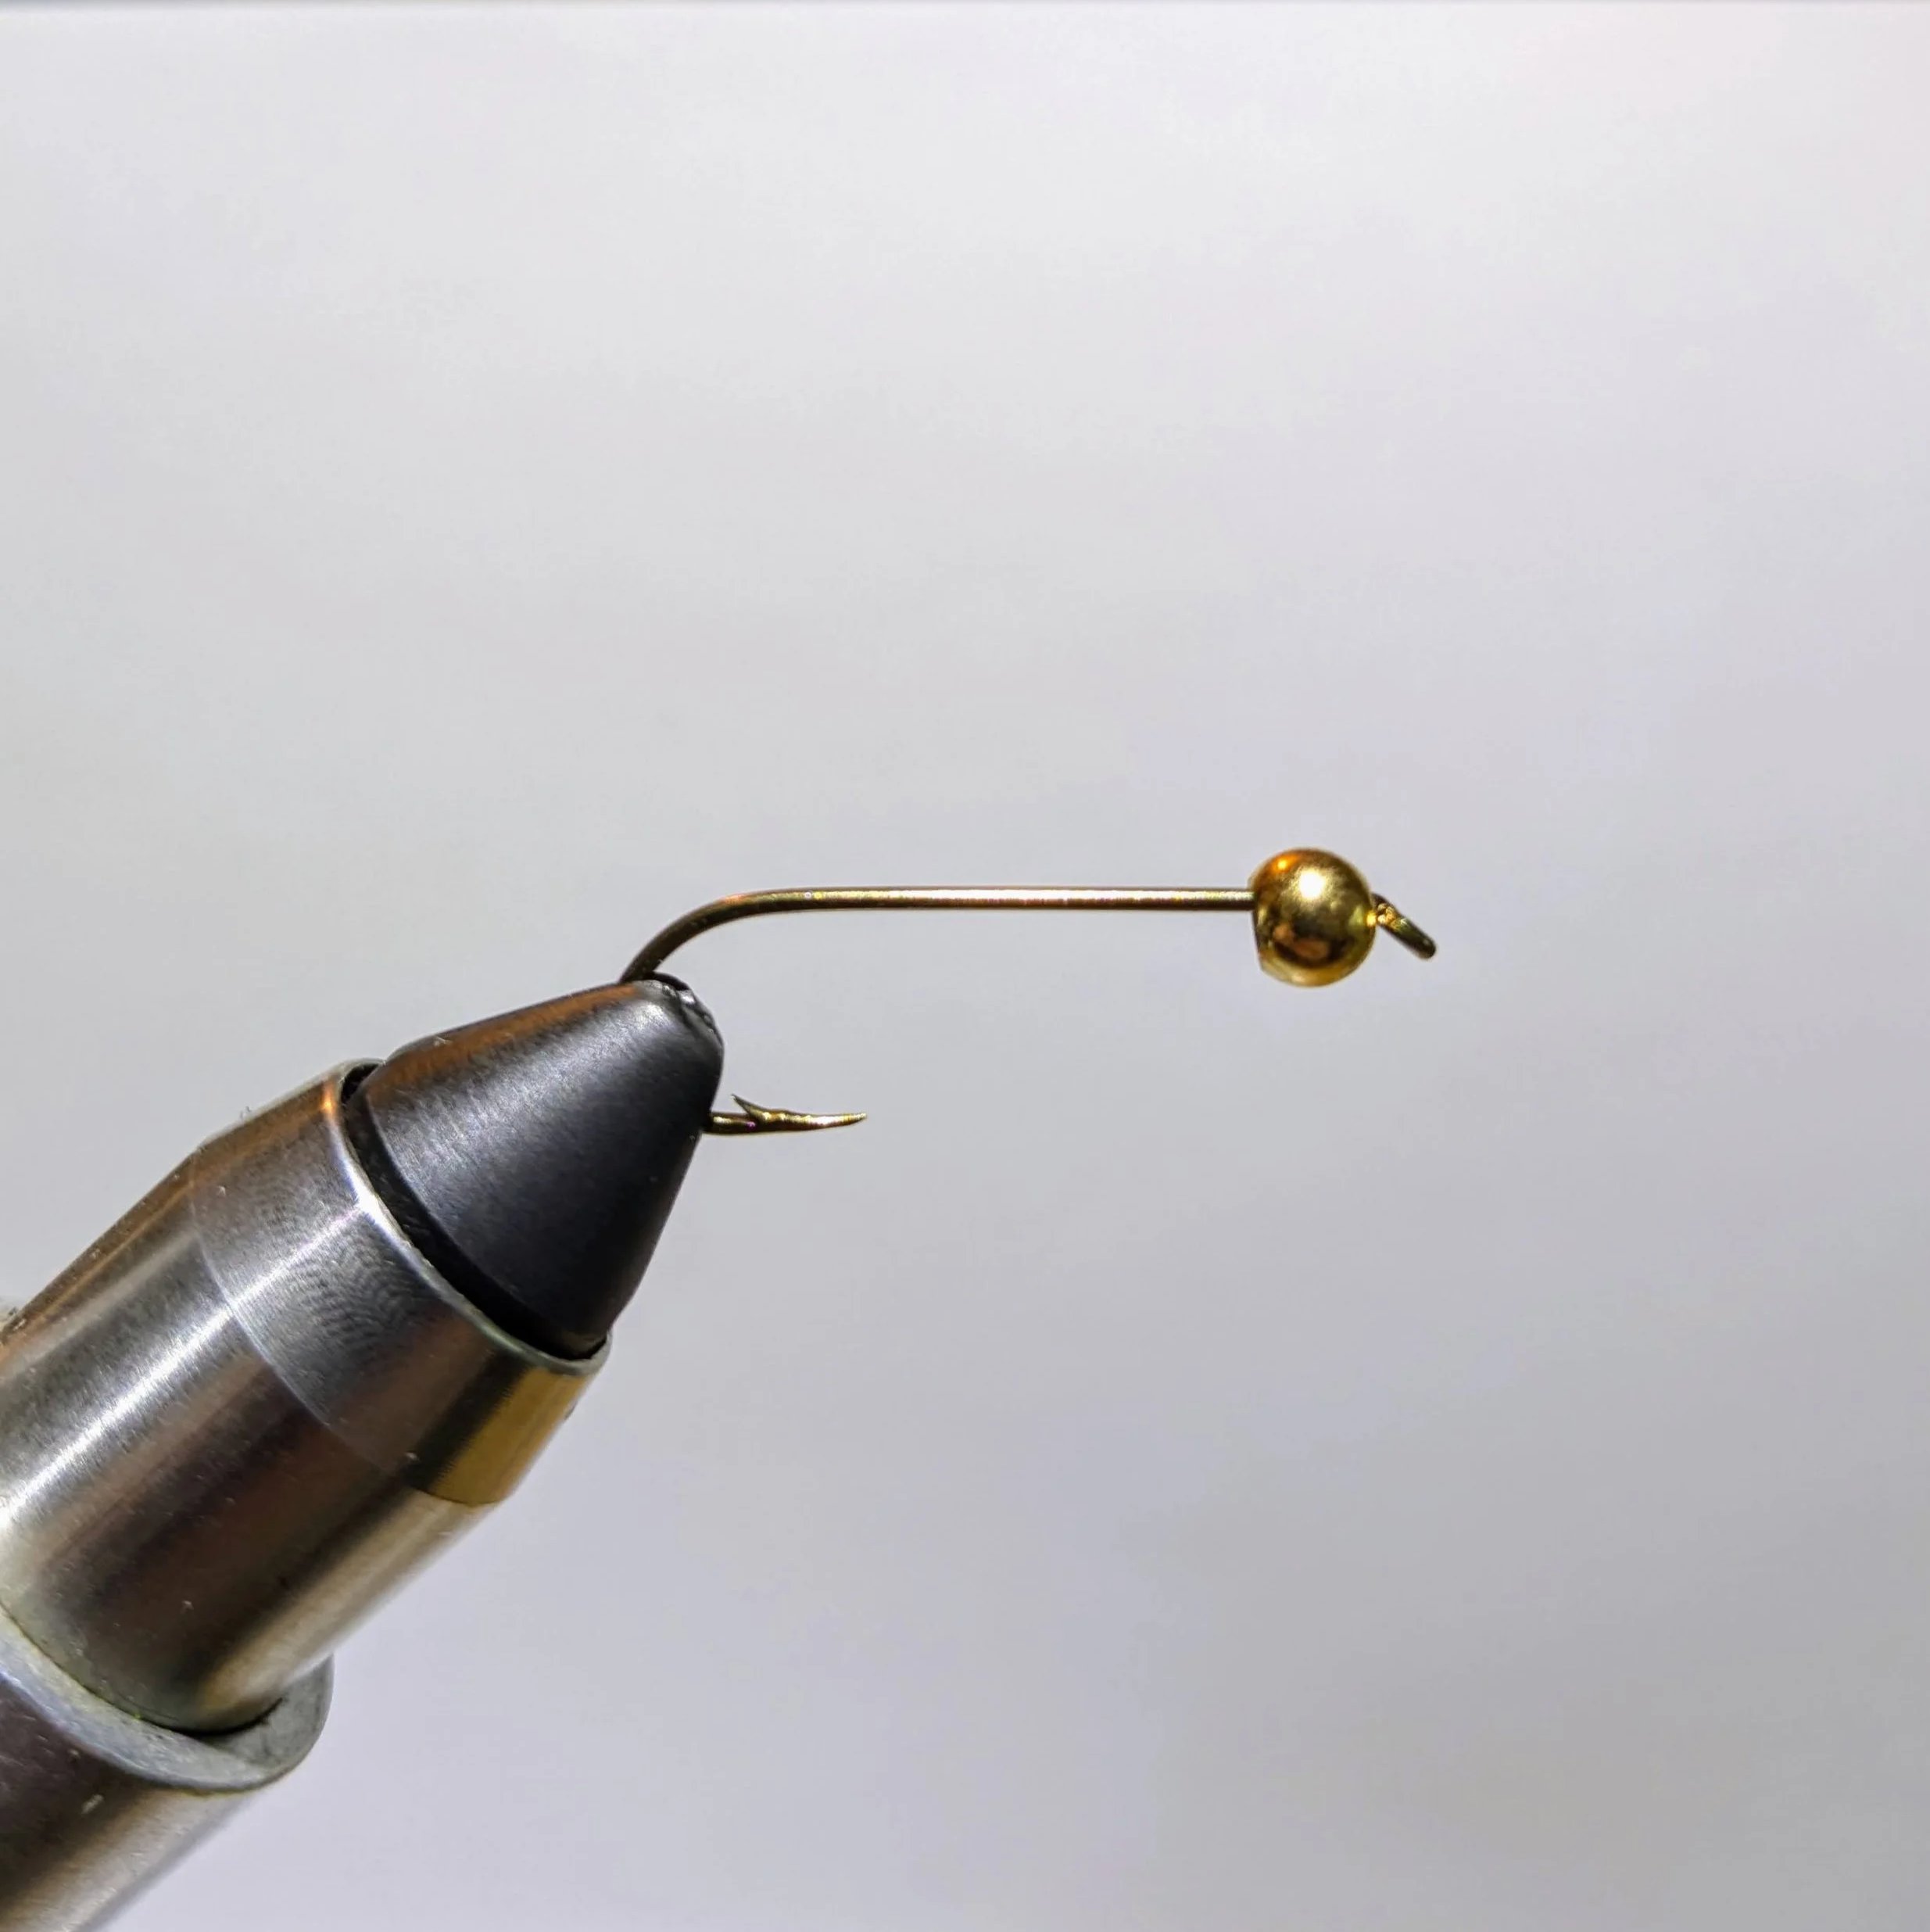
Step 1: Prepare the Hook and Bead
Slide the tungsten bead onto the hook, small hole first, and push it up to the eye. Secure the hook in your vise. If you're using additional weight, wrap 8-10 turns of lead-free wire behind the bead and push it forward to help secure it in place (not shown here).
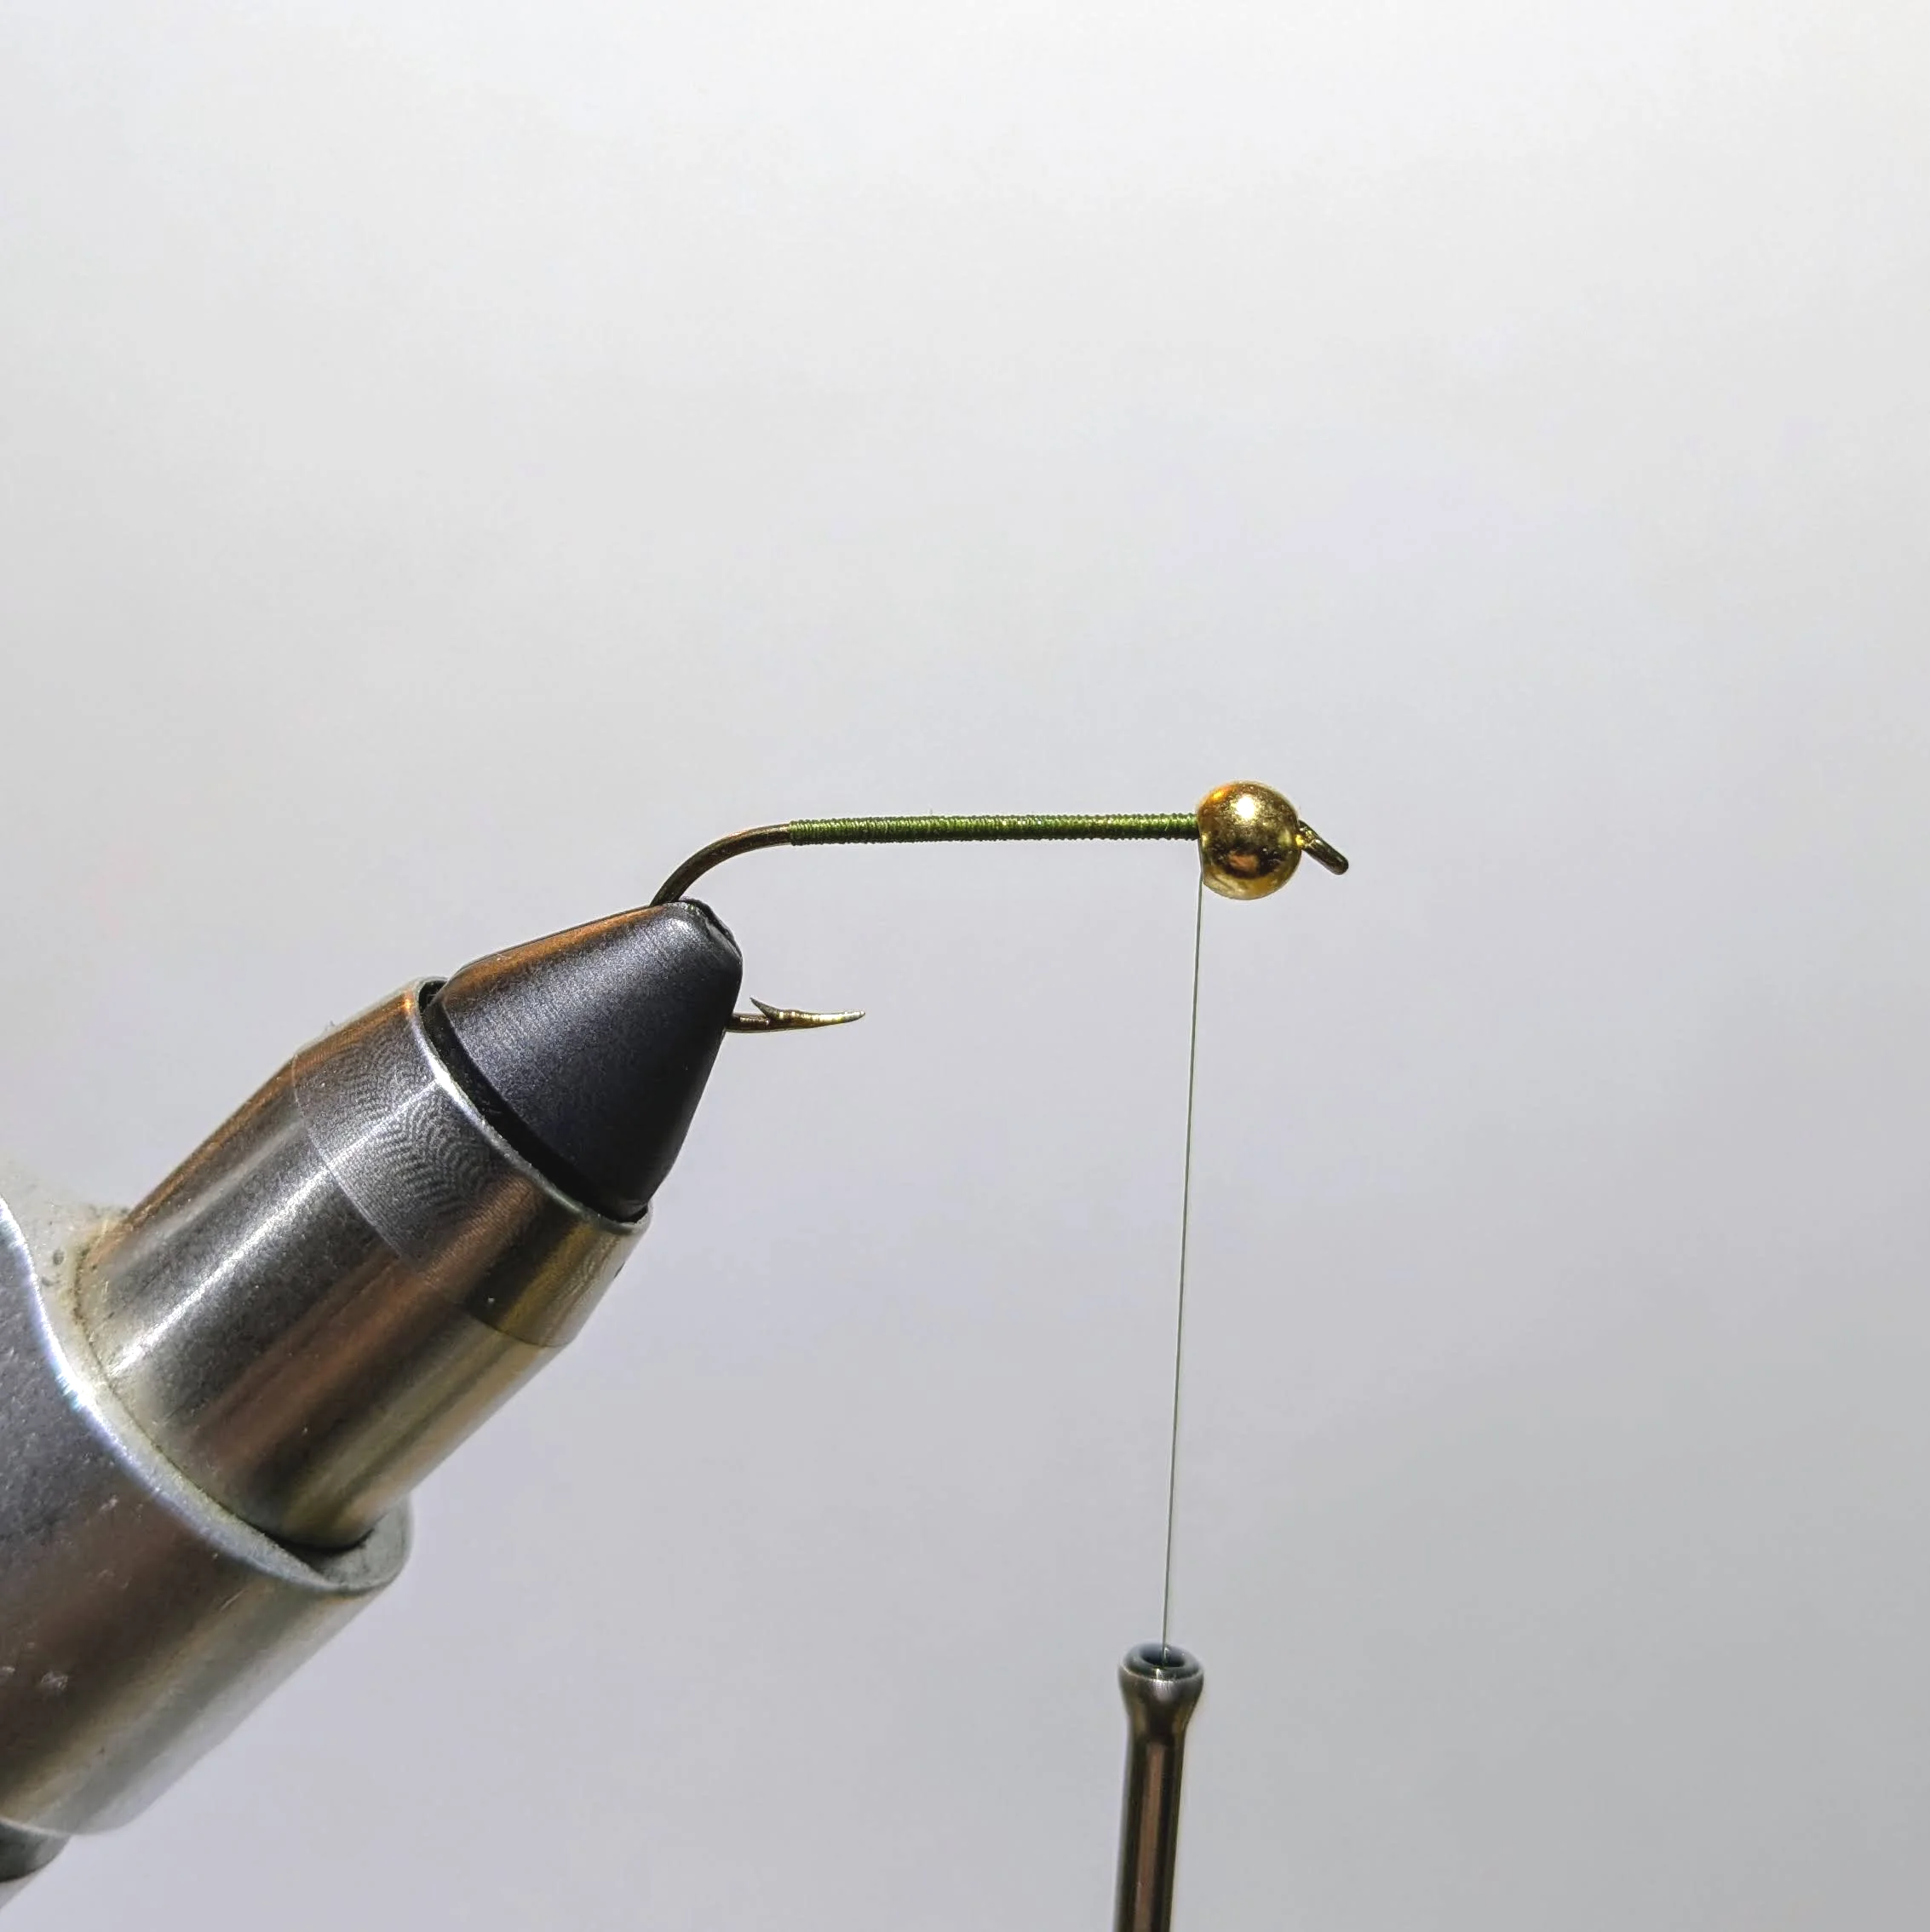
Step 2: Start the Thread
Attach your thread behind the bead and wrap back toward the hook bend. Ensure that you cover any lead wire wraps completely. Stop your thread directly above the hook point.
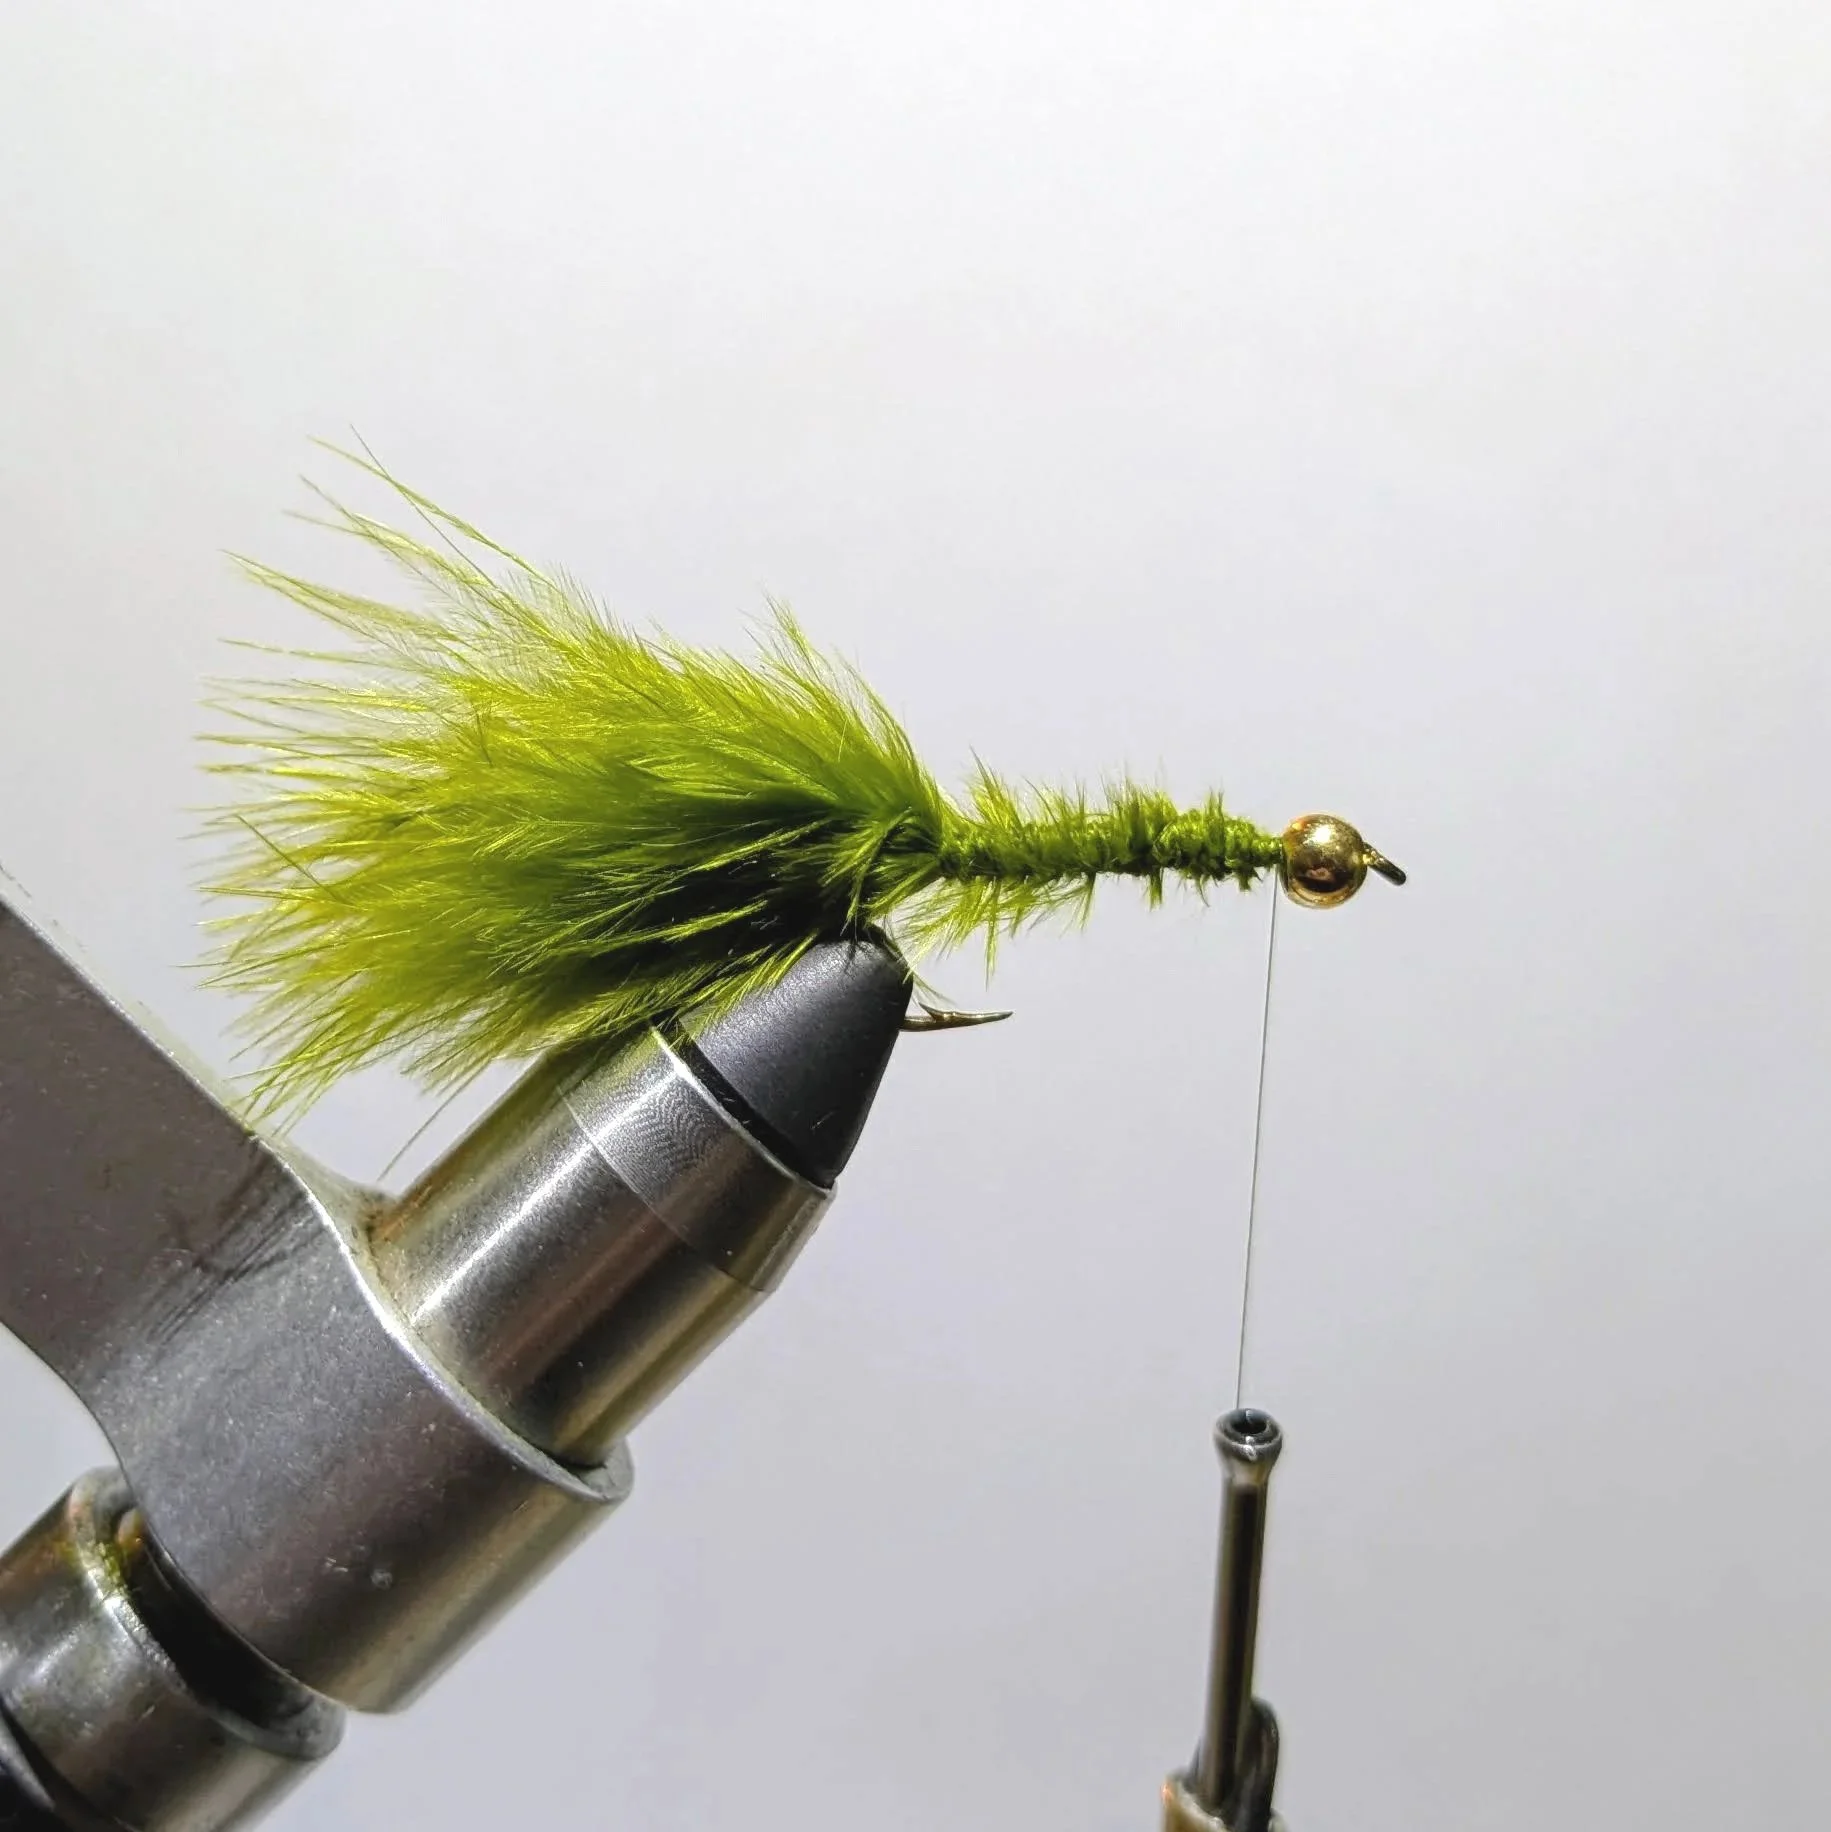
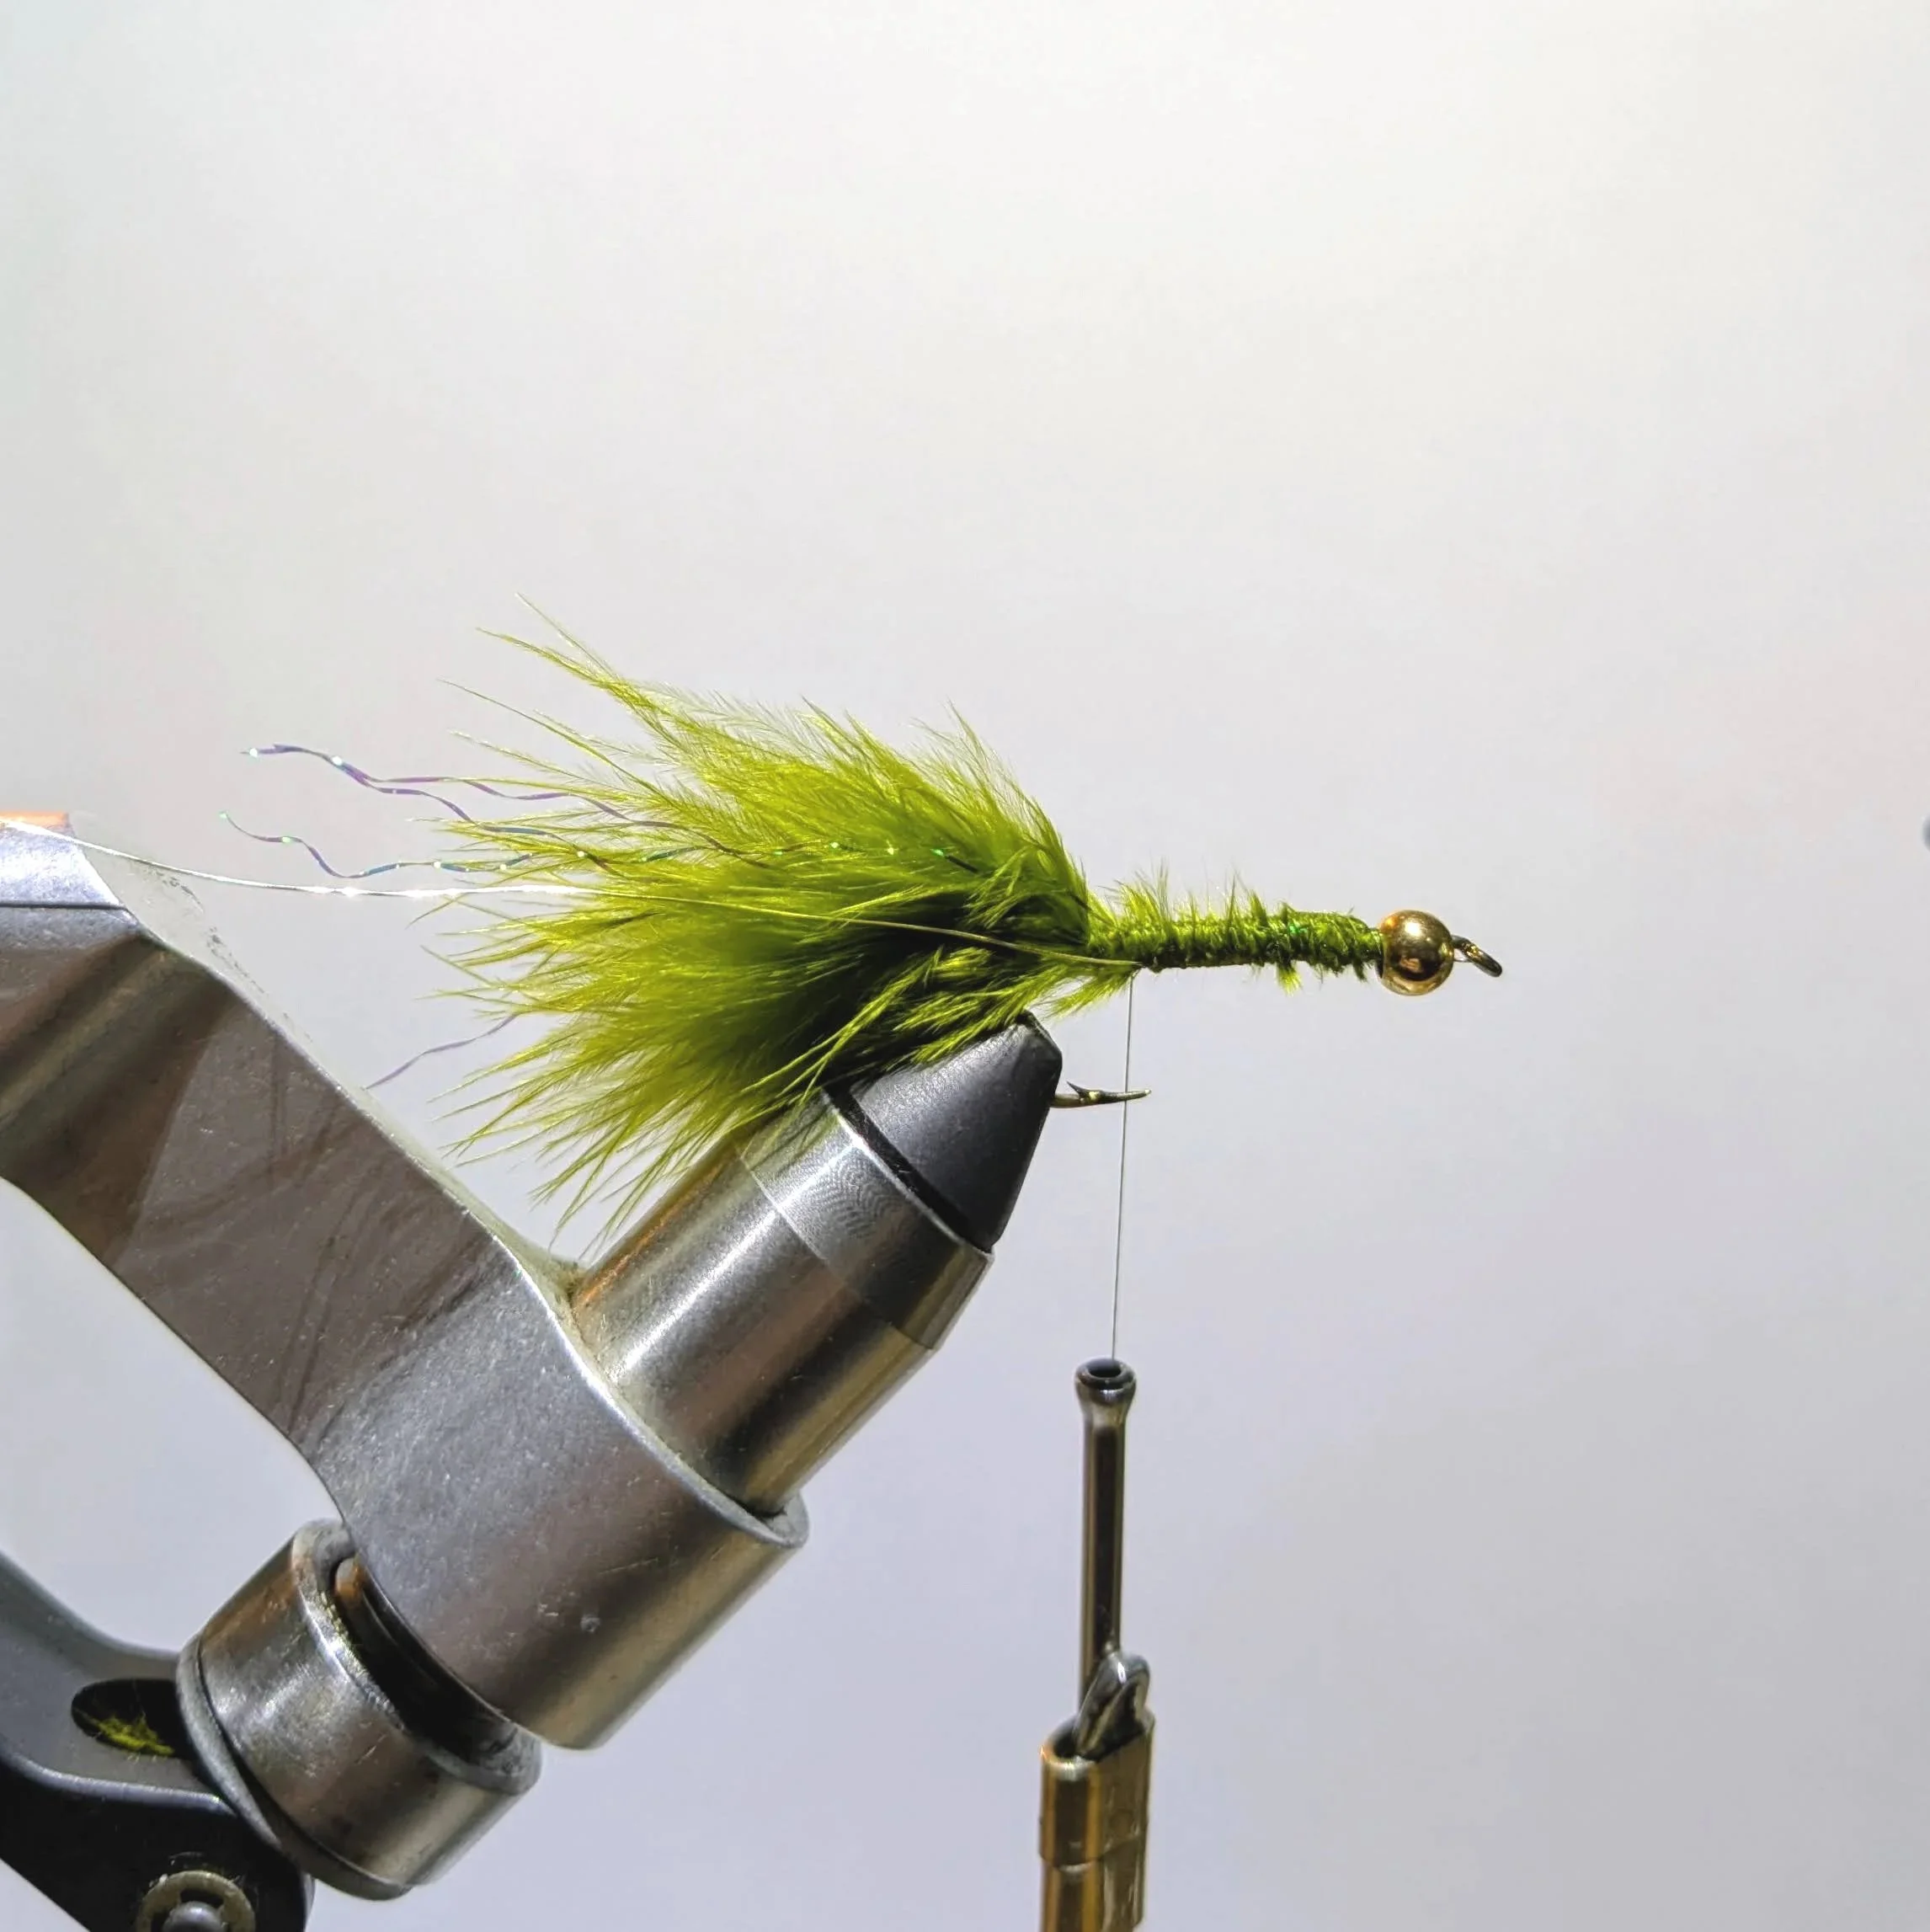
Step 3: Tie in the Marabou Tail
Select a small clump of olive marabou for the tail—about the thickness of a pencil. The tail should be approximately the same length as the hook shank. Tie in the marabou with several firm wraps, then trim the excess. It’s important not to overdress the tail.
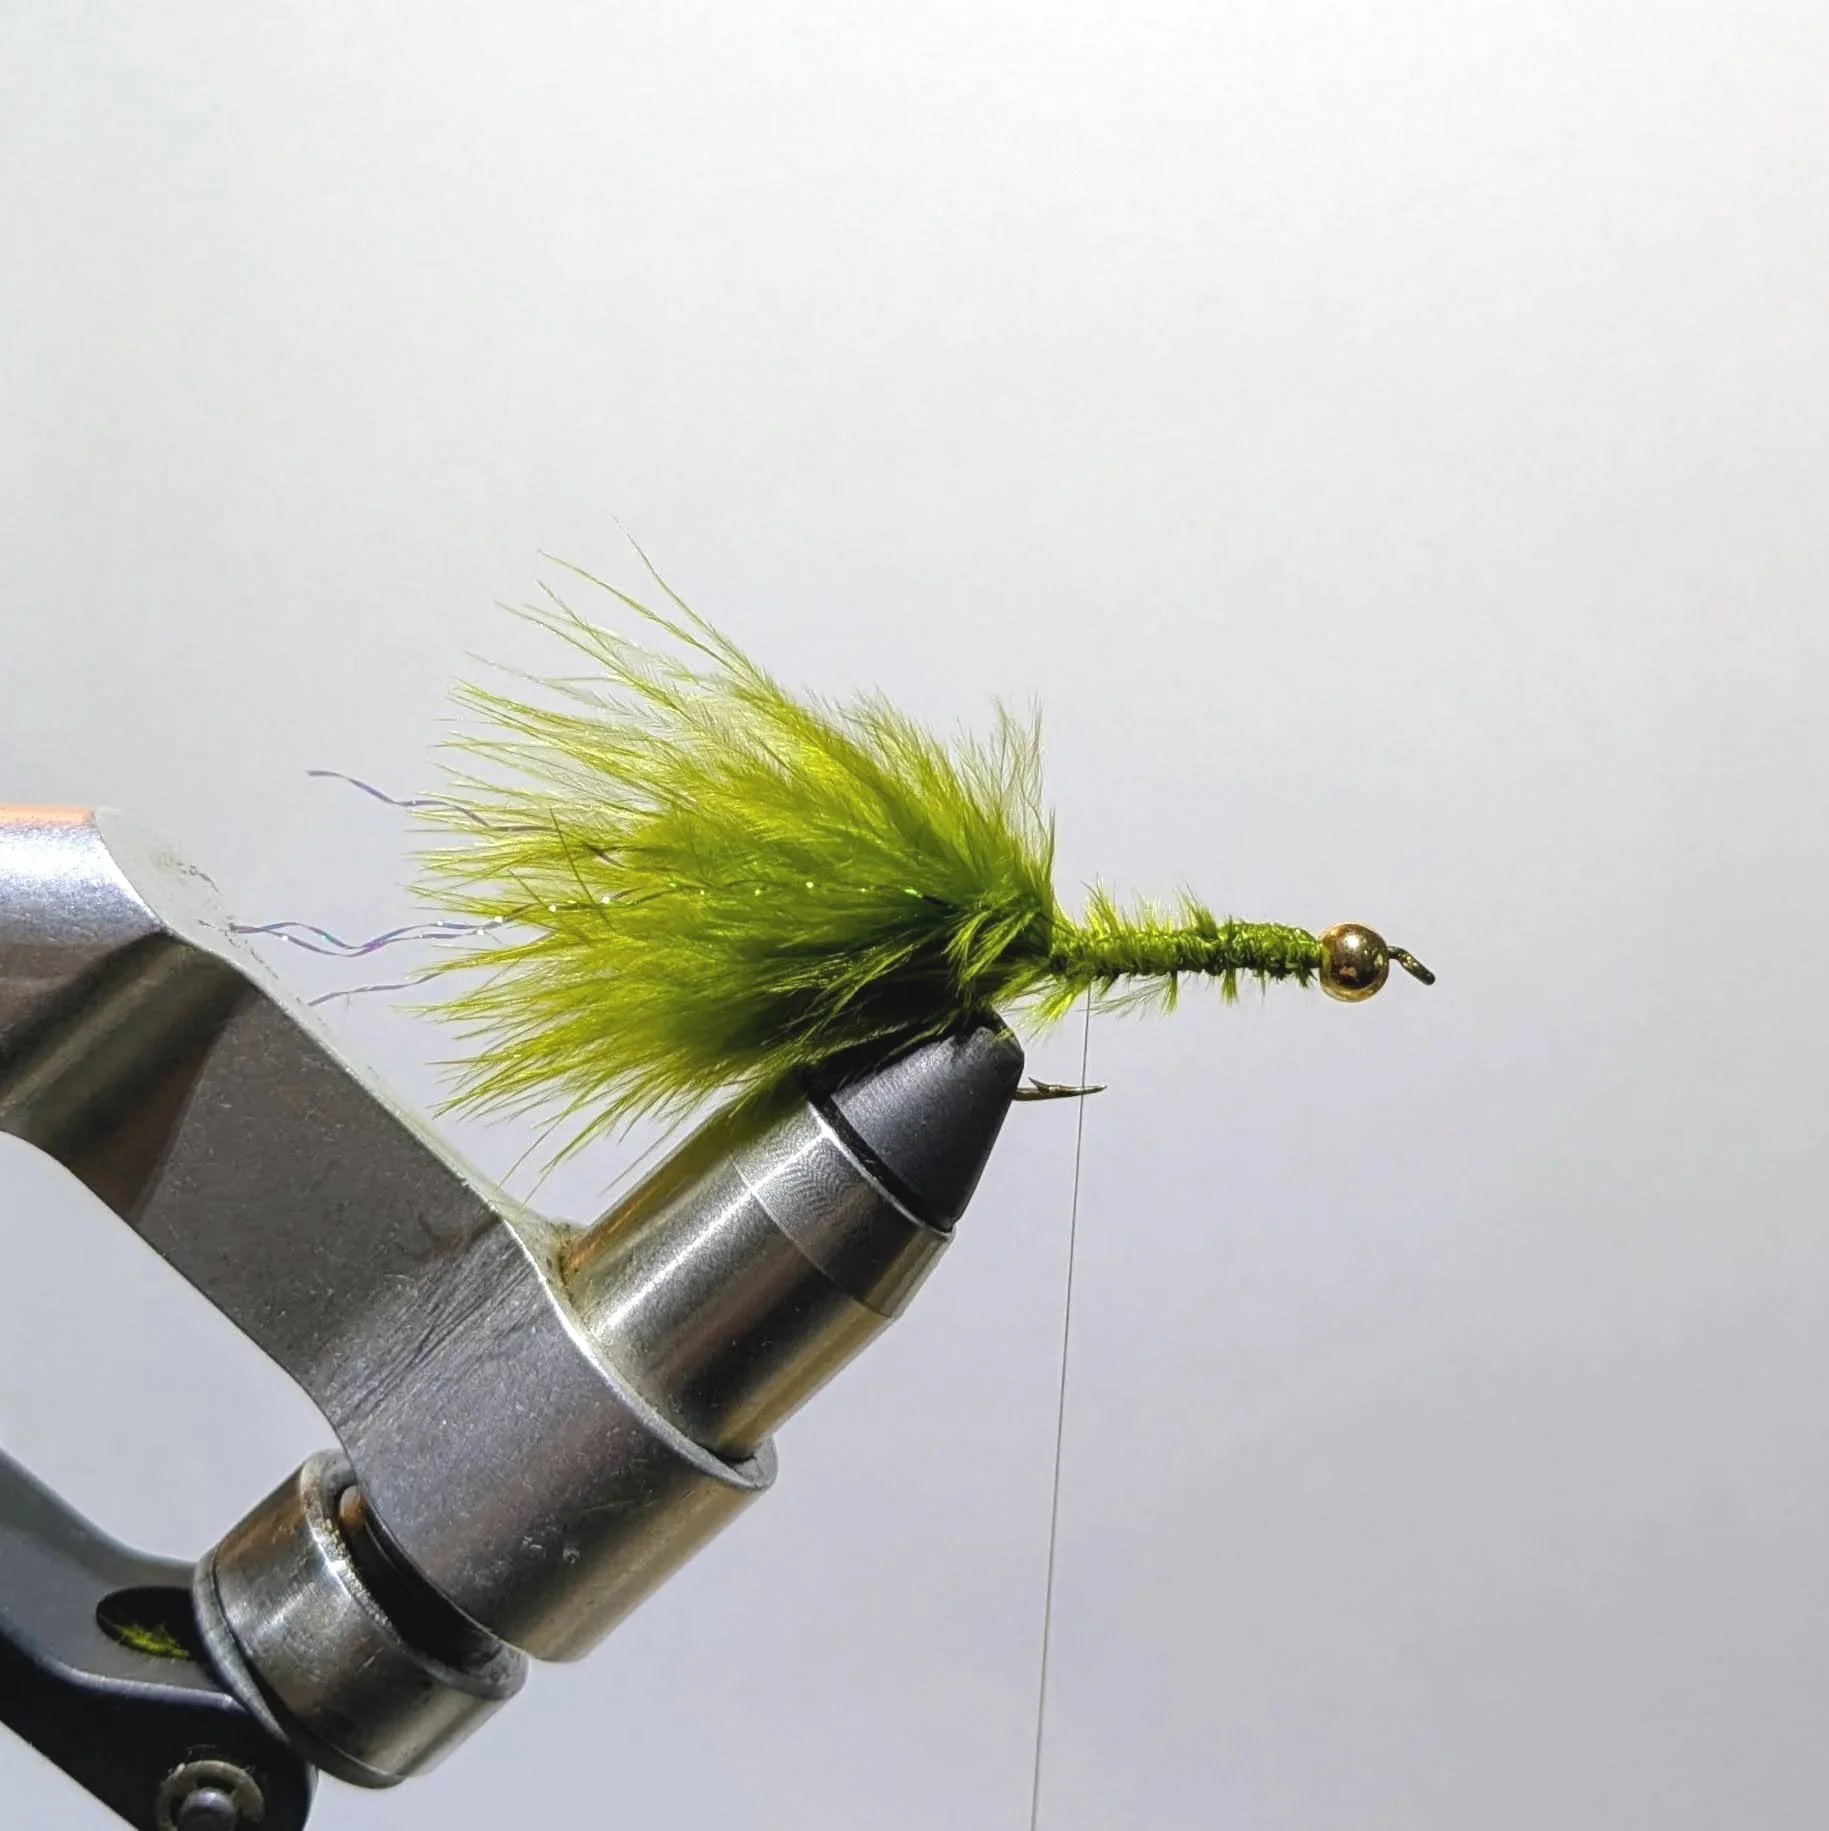
Step 4: Tie in the Flash
Next, tie in a couple of pieces of flashabou accent, making sure the strands are secured on either side of the tail.
Step 5: Tie in the Wire Rib
Secure the wire by laying it along the hook shank and making several firm wraps. Place the wire in a material clip to keep it out of the way during the next step.

Step 6: Tie in the Chenille
Take your olive chenille and tie it in at the tail tie-in point. Leave about 1/8 inch of chenille extending past the tie-in point, which you can trim later. This prevents the chenille from pulling out.
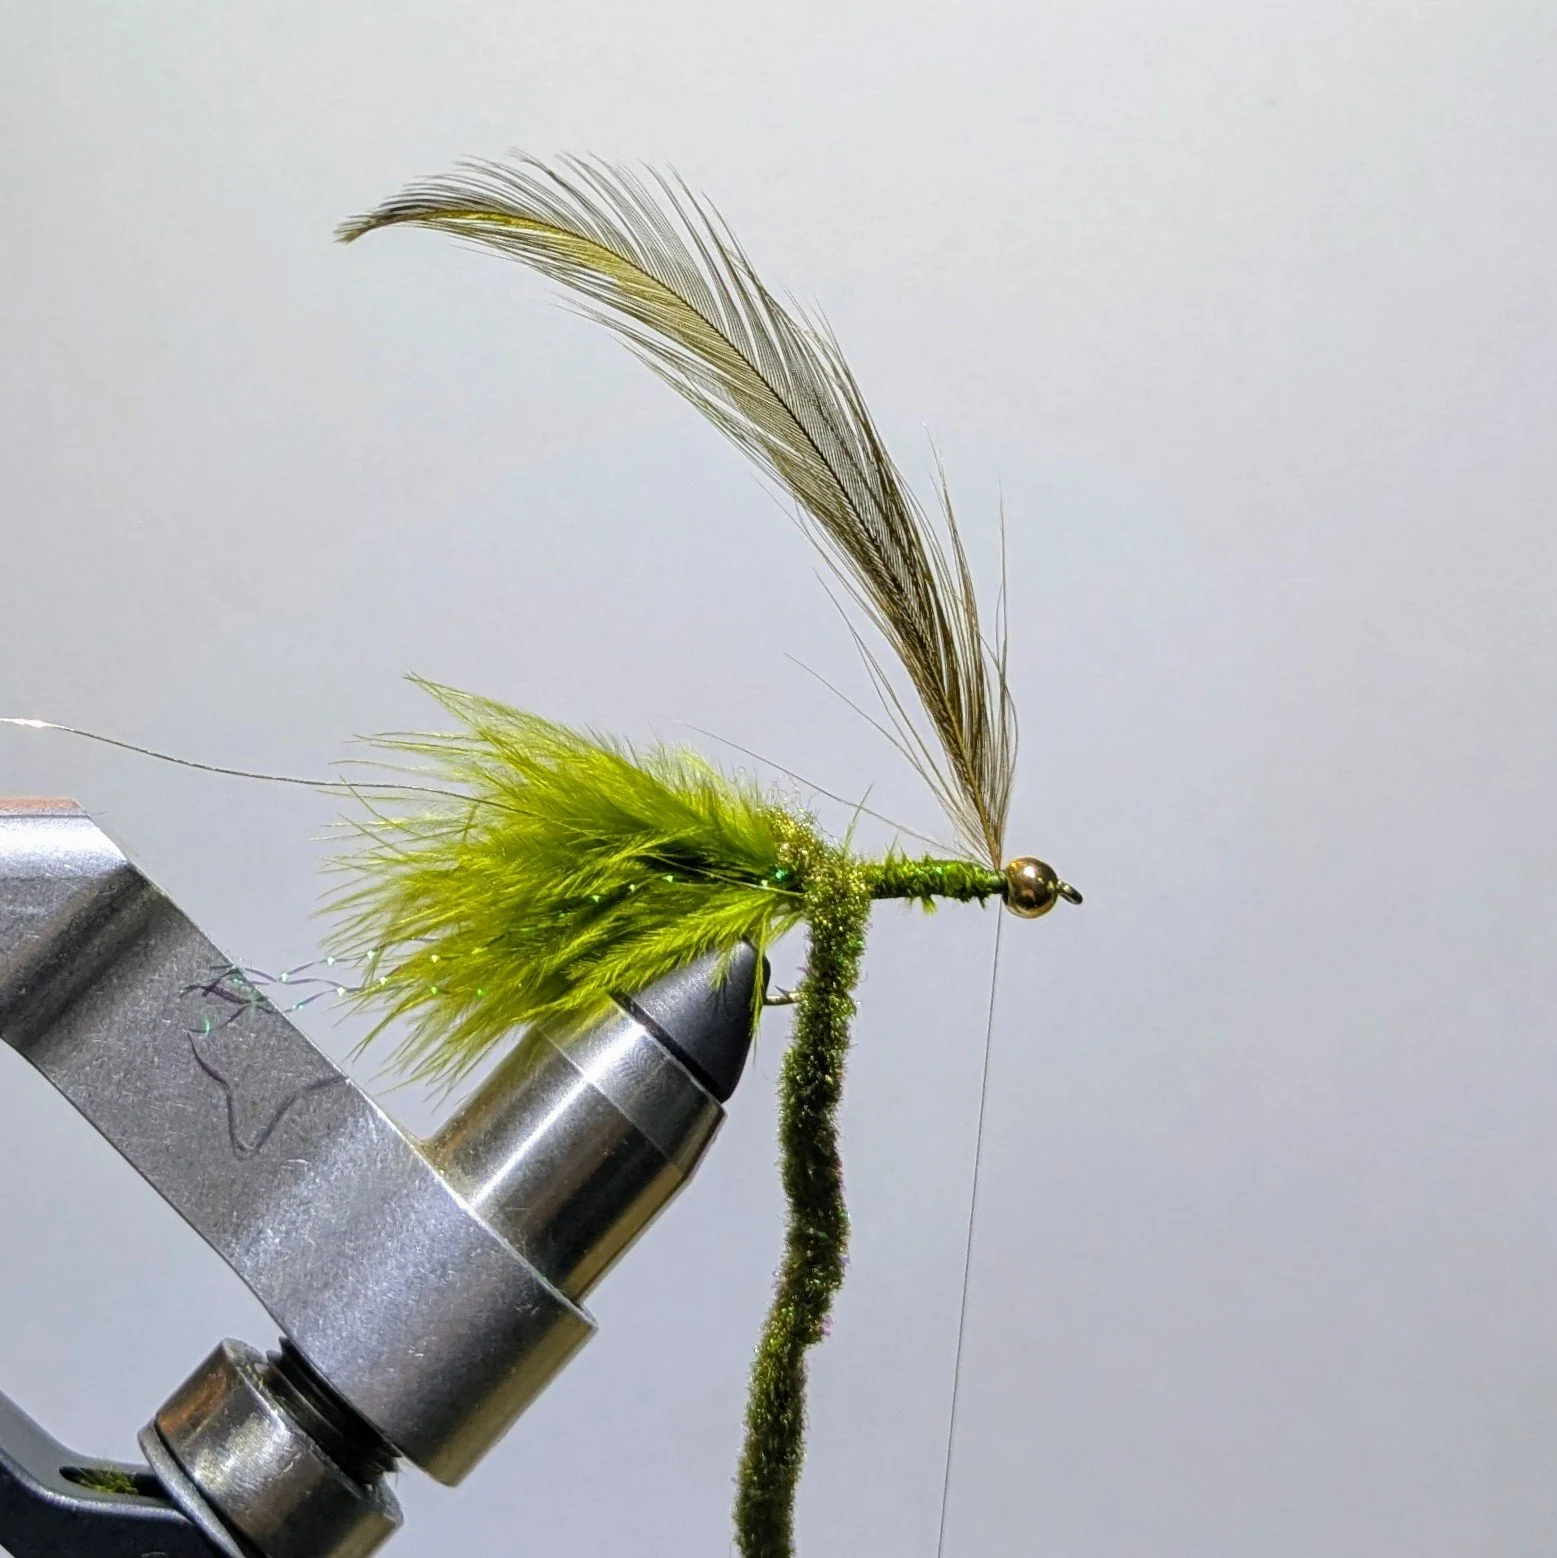
Step 7: Tie in the Hackle
Select a hackle feather with barbs that are about 1.5 times the hook gap when wrapped. A little longer or shorter is okay, depending on the profile you’d like to accomplish. Strip the fuzzy barbs from the bottom of the stem, leaving about 1/4 inch of bare stem. Tie in the hackle by the stem near the bead, with the shiny side of the feather facing you.
Step 8: Form the Body
Wrap your thread forward to just behind the bead, then wrap the chenille forward in touching turns to create a full, segmented body. Tie off the chenille behind the bead with several tight wraps and trim the excess.
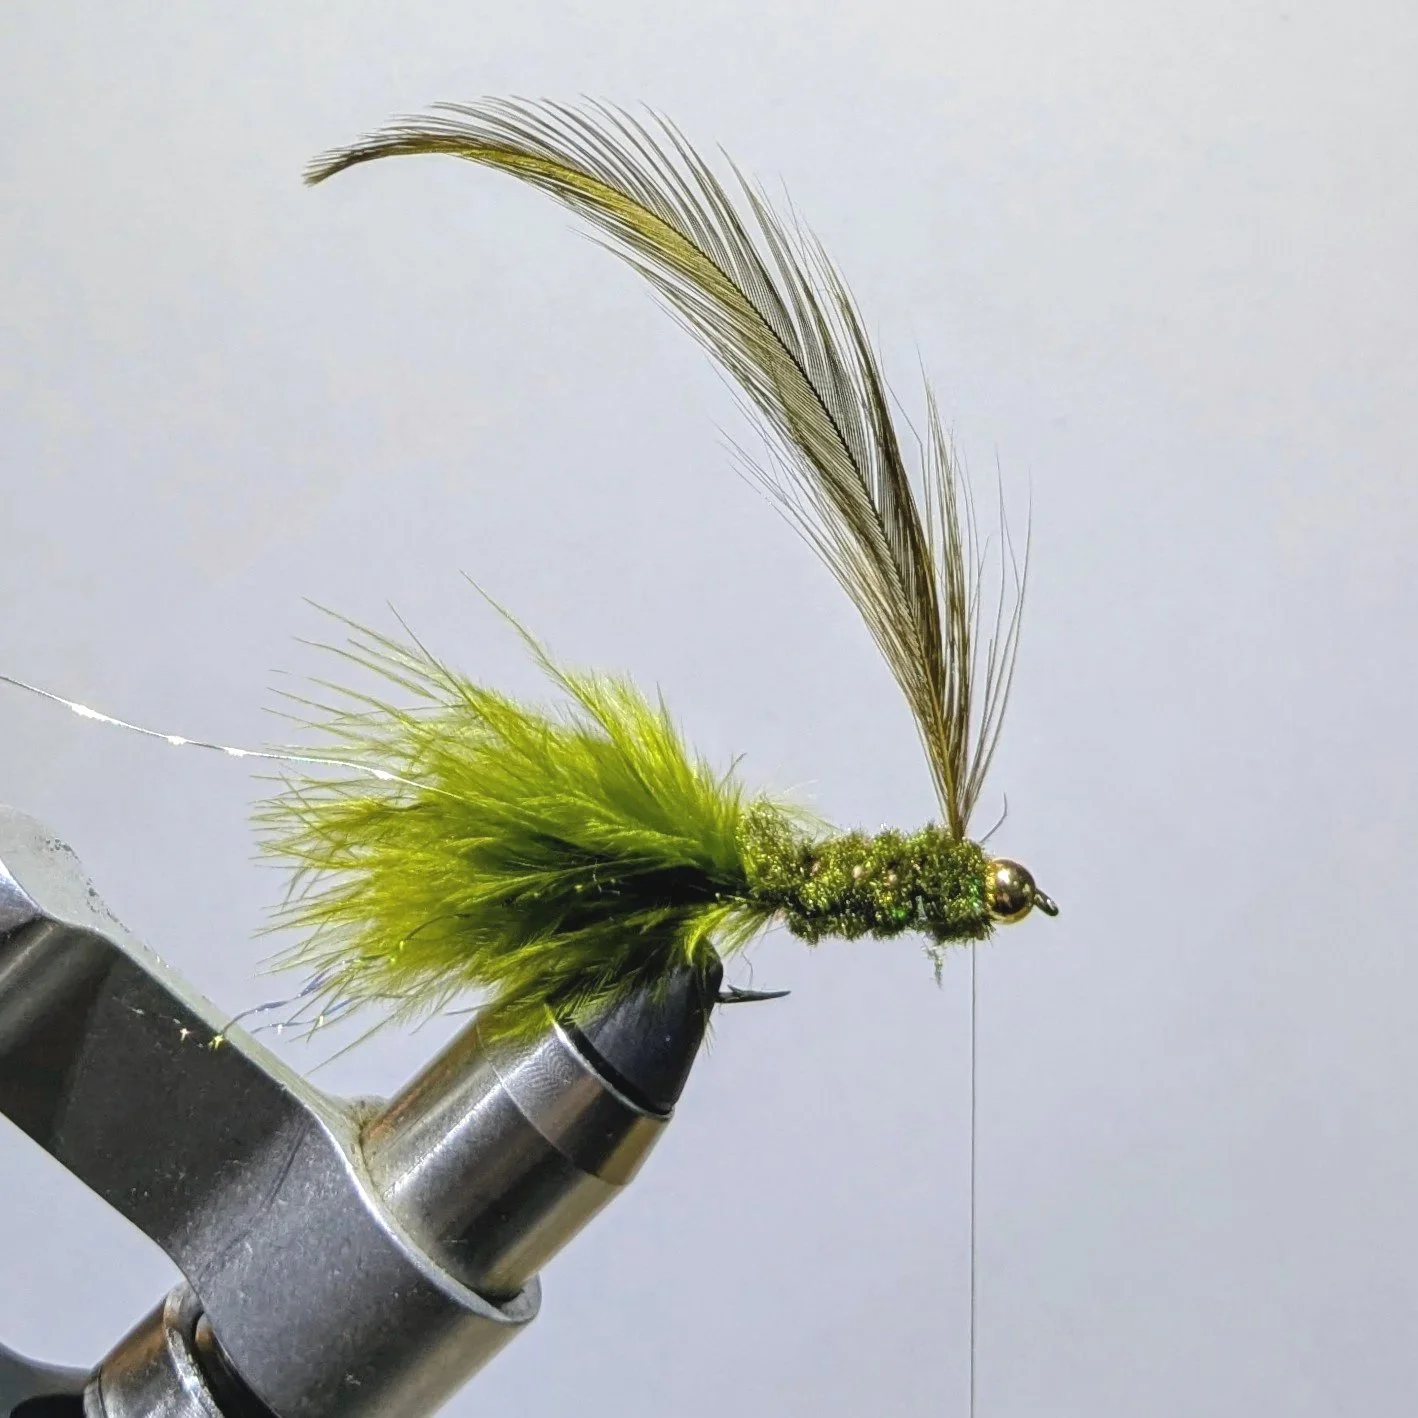
Step 9: Palmer the Hackle
Using hackle pliers, grab the tip of the hackle feather and begin wrapping it backward through the body in open spirals. The hackle should sweep back toward the tail. Tie off the hackle at the tail with two secure turns of wire, and trim the excess.
Step 10: Wrap the Wire
Wrap the gold wire in spirals in between the hackle and towards the front of the hook, being careful not to trap down hackle fibers. Secure the wire behind the bead with a few turns of thread, and trim the excess. Trapped hackle fibers can be teased out with a bodkin.
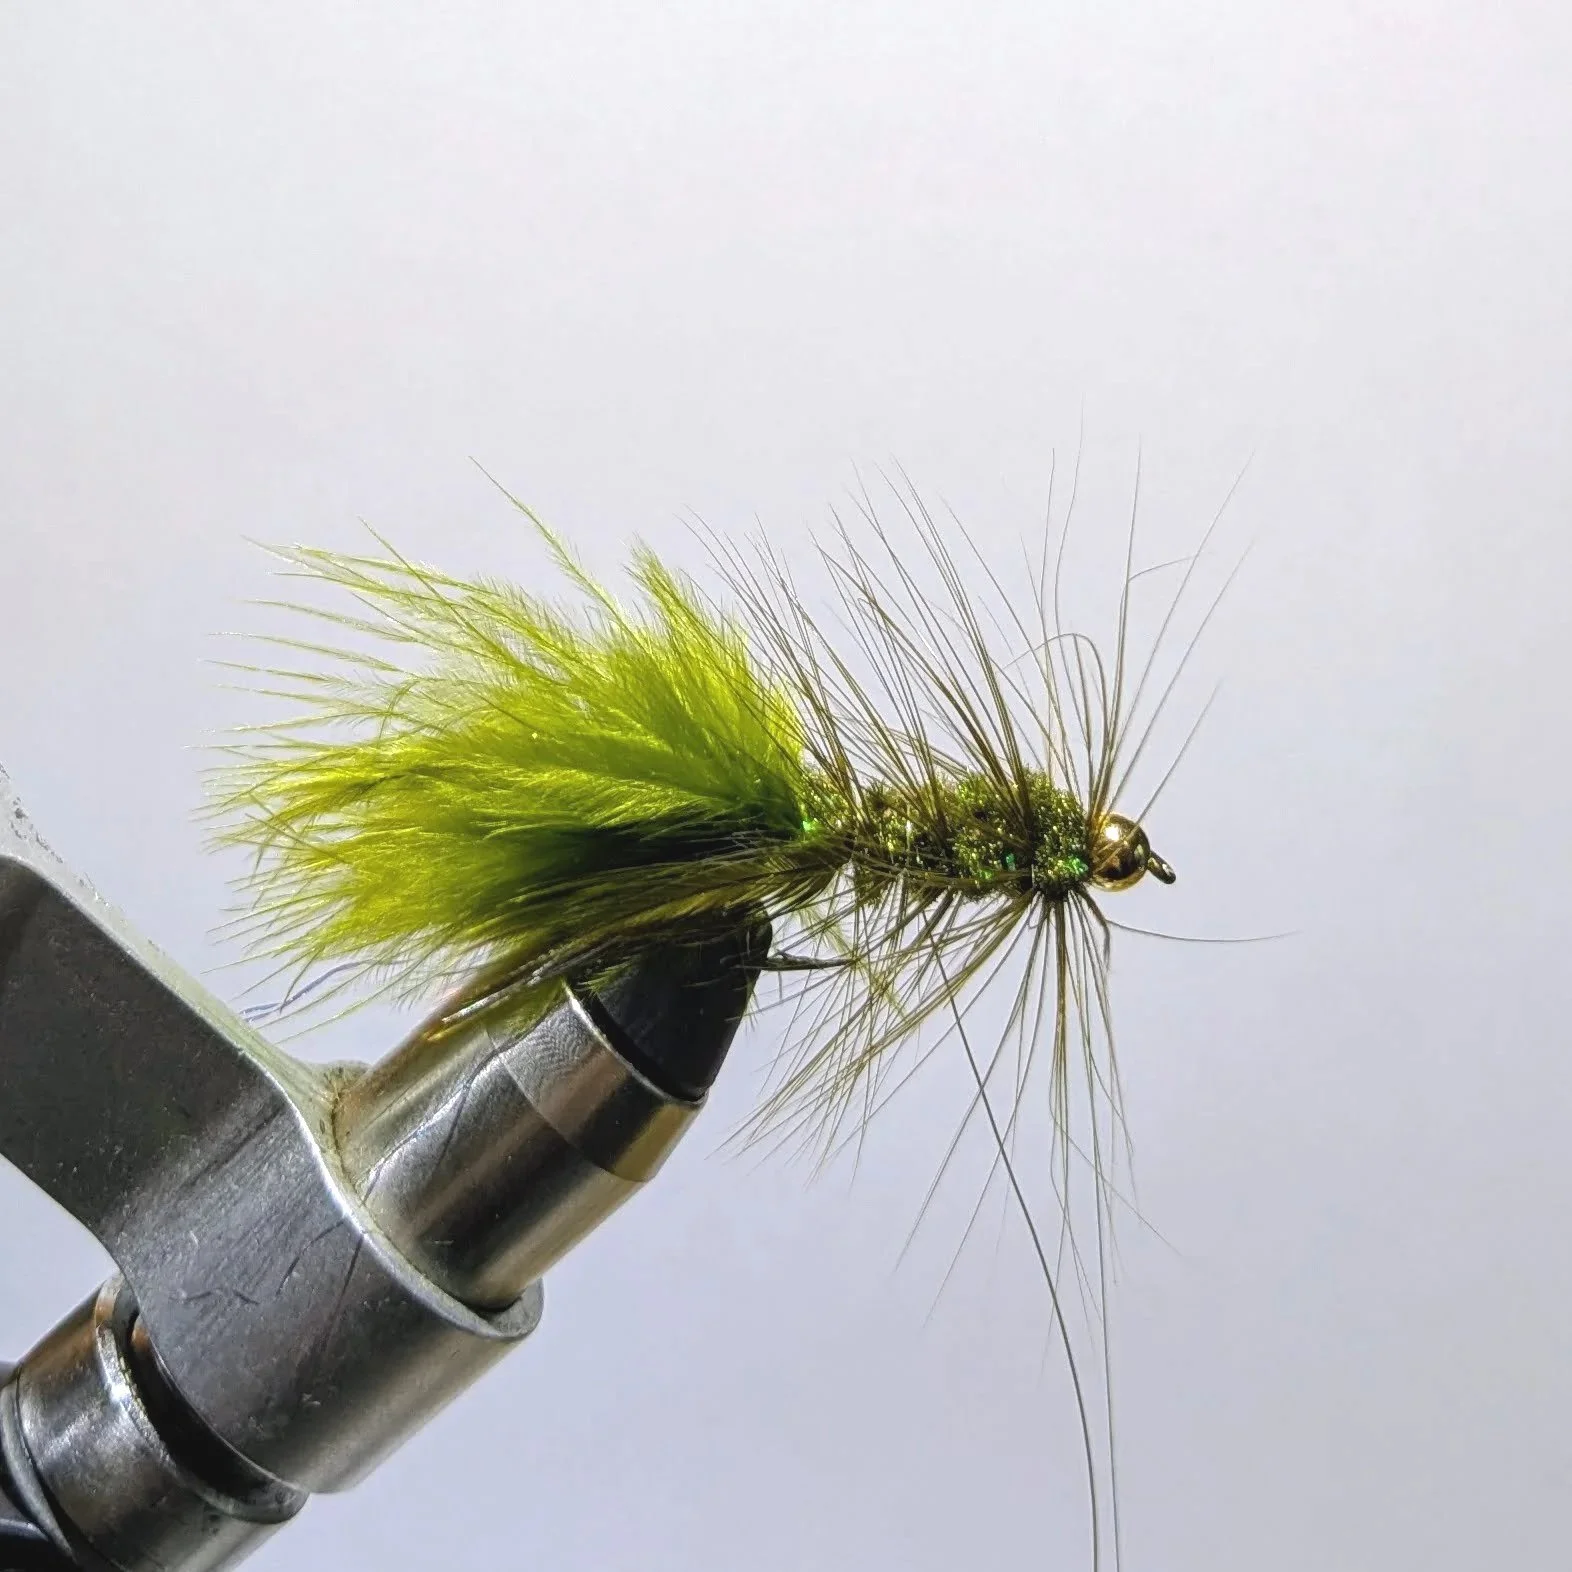
Step 11: Finish the Head
Build up a small thread head behind the bead, whip finish, and trim your thread. Apply a small drop of head cement or UV resin to the thread wraps for durability.
Tips for Success
Bead Selection: Gold beads work well in most conditions, but try copper in darker water or when imitating crayfish.
Hackle Technique: When palmering the hackle, maintain consistent spacing.
Tail Proportion: Keep the tail relatively sparse. An overdressed tail creates too much bulk, reducing the fly's swimming action.
Color Variations: While olive is highly productive, don't hesitate to experiment with black, brown, or other color variations.
Sizing: Larger sizes (2-6) work well for bass and steelhead, while smaller sizes (8-12) are perfect for trout.
Fishing the Olive Woolly Bugger
This pattern excels when fished with varied retrieves. Try slow strips near the bottom for imitating leeches, or faster retrieves in the mid-water column to imitate baitfish. Fishing the fly on a swing can also be very effective. Sometimes, a dead drift presentation is exactly what’s needed. The bead head helps the fly sink quickly, making it ideal for reaching fish in deeper water.
The olive woolly bugger is particularly effective during spring and fall when fish are actively feeding on larger prey. It's also an excellent searching pattern when you're unsure what fish are eating.
Conclusion
The olive bead head woolly bugger may look simple, but its fish-catching ability is legendary. Master this pattern, and you'll have a go-to fly that produces in virtually any freshwater situation. Confidence in your fly is half the battle—and with a well-tied woolly bugger on your line, you should have plenty of confidence!
Ready to see this pattern come to life? Check out our video tutorial showing each step of the tying process.
FAQ
-
The woolly bugger is a highly versatile fly pattern used to imitate a wide range of prey, including leeches, baitfish, and large aquatic insects. It is effective in both still and moving water.
-
While olive is a top producer, black, brown, and purple are also highly effective. It's often best to match the color to local prey or water conditions.
-
A bead head adds weight to the fly, allowing it to sink quickly to the depth where fish are feeding. It also adds a flash of attraction that can trigger strikes from curious or aggressive fish.
-
Hook sizes for woolly buggers typically range from a large size 2 down to a small size 12. Larger sizes (4-8) are great for targeting bass and steelhead, while smaller sizes (10-12) are perfect for trout.