

Lightning Bug Jig Nymph
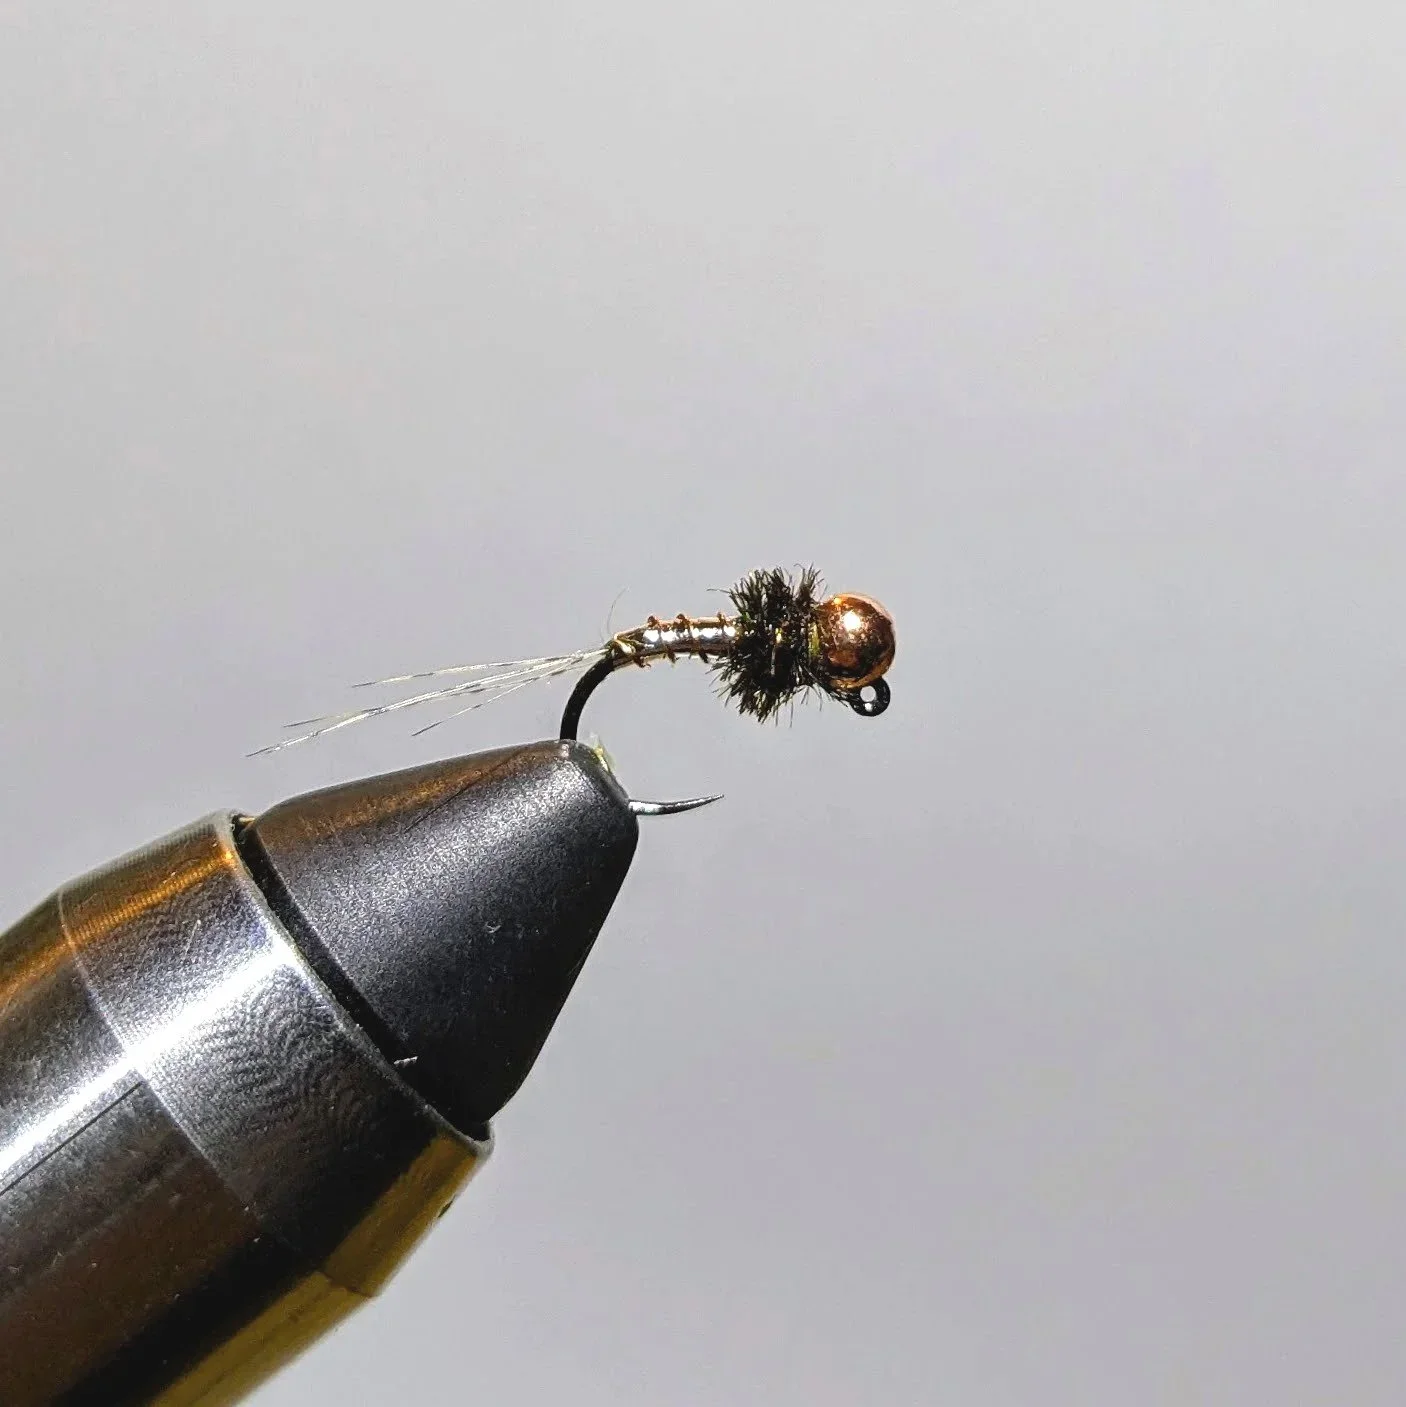
When trout are being selective and traditional patterns aren't producing, the Lightning Bug Jig Nymph cuts through the water column like a beacon of opportunity. This deadly effective pattern combines the fish-triggering flash of tinsel with a 60-degree jig hook and slotted tungsten bead, creating an irresistible combination. Whether you're prospecting unfamiliar water or targeting spooky fish in heavily pressured streams, the Lightning Bug excels as an attractor pattern and reliable search fly.
Materials List
Hook: Hanak 450BL Jig Hook, size 12-16
Bead: Slotted tungsten bead, sized to match the hook.
For a size 16 hook, use a 2.5mm bead.
For a size 14 hook, use a 2.5mm or 3.0mm bead.
For a size 12 hook, use a 3.5mm bead.
Thread: 8/0 olive
Tail: Coq de Leon fibers
Rib: Small wire, copper
Body: Mylar tinsel
Thorax: Peacock herl
Tying Instructions: A Step-by-Step Guide
1. Prepare the Hook and Bead:
Slide the slotted tungsten bead onto the Hanak 450BL hook shank, with the smaller hole facing the hook point.
Secure the hook in your vise. Make sure the hook rides level.

2. Lay the Thread Base:
Start your thread behind the bead and create a smooth, even thread base that extends to the bend of the hook.

3. Tie in the Tail and Wire Rib:
Select a few Coq de Leon fibers (about 4-6). The length of the tail should be approximately the length of the hook shank.
Tie in the Coq de Leon fibers at the bend of the hook. Don't worry about being perfect; a little "bugginess" is a good thing.
Next, tie in your wire ribbing at the same point. Let it hang back over the tail.

4. Tie in the Tinsel:
Cut a short length of mylar tinsel.
Tie it in at the base of the tail, securing it tightly.

5. Form the Body:
Bring your thread forward, creating a slight taper as you go, and stop about 1/3 of the way back from the bead.
Wrap the mylar tinsel forward in slightly overlapping turns, creating a smooth, tapered body.
Tie off the tinsel and clip the excess.

6. Rib the Body:
Now, wrap the wire ribbing forward over the mylar tinsel. This will create a segmented look and add durability to the fly.
Tie off the wire behind the bead and helicopter the excess until it breaks off cleanly.

7. Form the Thorax:
Take two or three strands of peacock herl. Stroke the fibers out from the stem. Break off the brittle ends of the tips, then tie in the strands by the tips.
Wrap the peacock herl behind the bead to create a small, defined thorax. You can add a little more if you want a buggier look.
8. Finish the Fly:
Whip finish behind the bead to secure your thread.
Fishing the Lightning Bug Jig Nymph
A durable and effective Lightning Bug Jig Nymph, this pattern is particularly deadly when fished on a Euro Nymphing rig. Still, it can also be a fantastic anchor fly under an indicator. Tie some up in various sizes, and you'll be well-prepared for your next day on the water.
Material Substitutions
Here are some effective substitutions:
-
Pheasant tail fibers or micro fibetts
-
Brown, black, or olive dubbing
-
Small copper wire is preferred, but brass or gold wire works